


How to Lower Crib Mattress Safely Step by Step
You walk into the nursery expecting a sleepy baby and find a very pleased little person sitting upright instead. Cute milestone. Immediate follow-up question: does the crib mattress need to move down before tonight?
Yes, if your baby's new abilities have made the current setting unsafe. Learning how to lower a crib mattress isn't about finding a universal "correct hole." It's about following your crib's manual, securing the support, and checking that the firm, snug mattress still leaves the protective barrier your child needs.
Disclosure: Hiccapop makes the Dual-Sided Foam Crib Mattress mentioned in this post.
When to Lower the Crib Mattress
Watch the milestone, not the birthday. A baby who starts sitting or pushing up needs a different crib setup from a baby who stays lying down, even if their birth dates are close together.
Health Canada's crib, cradle, and bassinet guidance says to move the mattress support to its lowest level as soon as a baby can sit upright or push up on their hands and knees. Remove mobiles and toy bars at that stage, too, because a newly mobile baby may reach and pull them.
The American Academy of Pediatrics' nursery guidance takes an anticipatory approach: lower the mattress before your baby can sit, and have it at its lowest position before your child learns to stand. The AAP notes that the most common crib falls happen when a baby tries to climb out.
Act on emerging skills
You don't need to wait for a polished performance. A wobbly sitter or a baby starting to push upward is giving you useful information about what may happen next.
- Sitting is emerging: Check the manual and lower the support before independent sitting becomes the nursery's newest party trick.
- Hands and knees are happening: Move to the manufacturer-designated lowest position.
- Pulling upward has started: Don't leave the adjustment for another weekend.
- Reaching has changed: Remove reachable mobiles and toy bars rather than raising them a little.
This milestone timeline makes the progression easier to recognize.
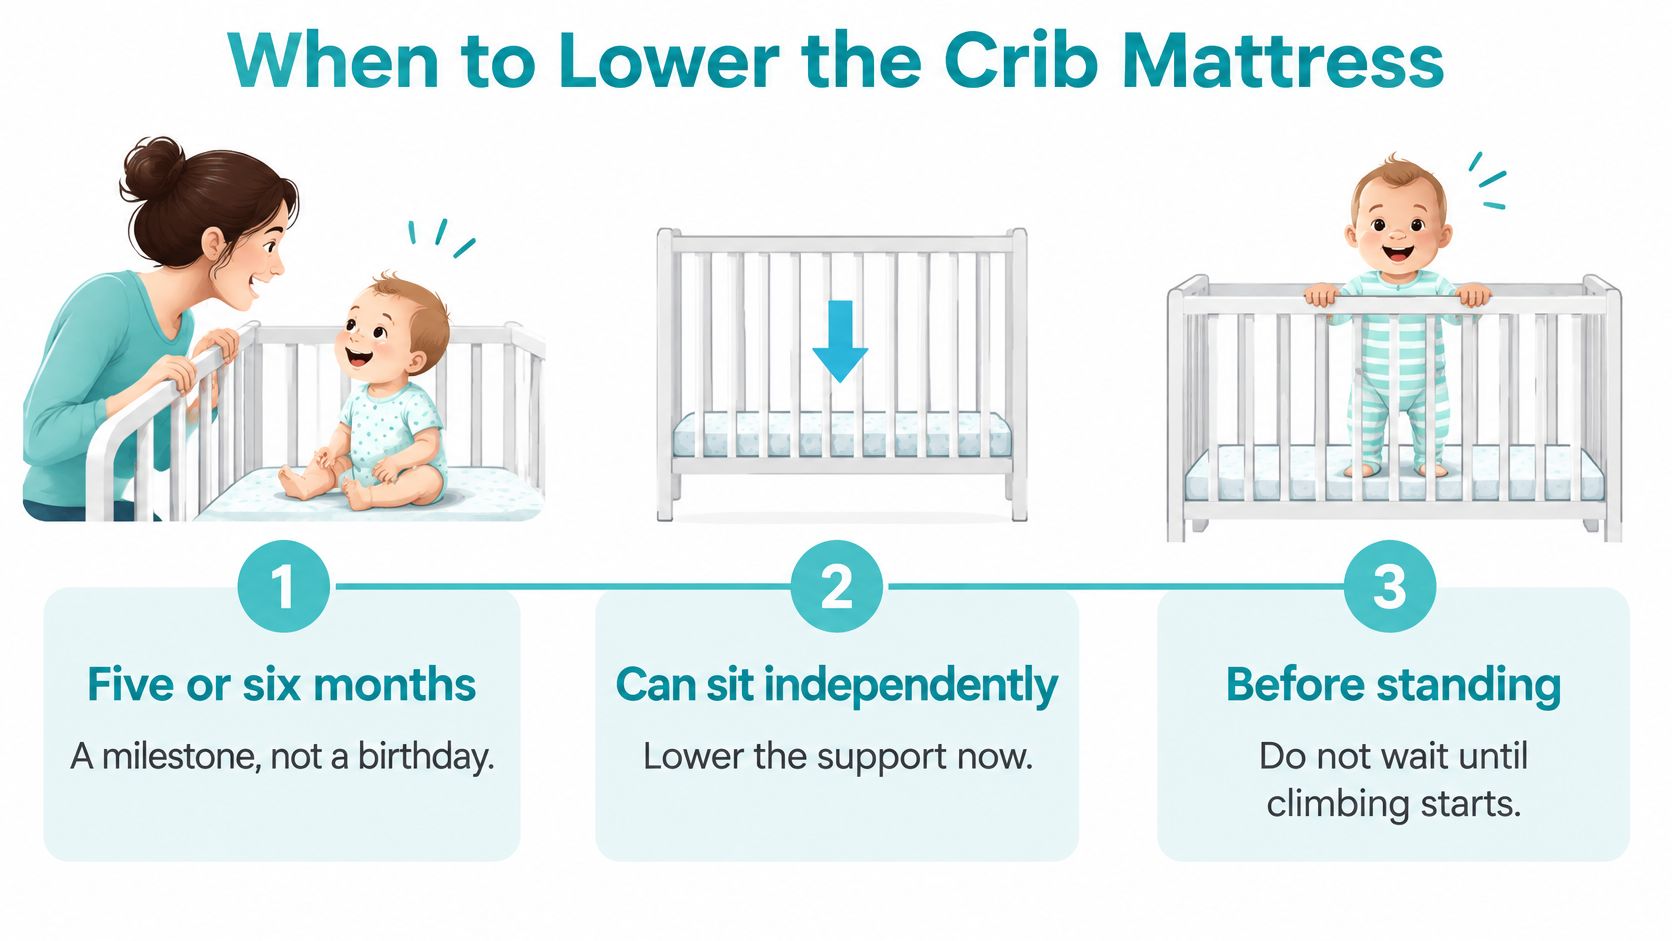
Don't wait for a climbing demonstration
Say your baby sits independently during playtime but hasn't done it in the crib yet. Treat that ability as relevant to sleep, too. Babies don't reserve new skills for the room where they learned them.
Practical rule: Adjust for what your baby can do, not just what you've caught them doing in the crib.
Make the change when sitting, kneeling, or upward pulling emerges, before the next sleep if the current position is no longer appropriate. Your crib manual controls the adjustment procedure; climbing and outgrowing the crib require a separate decision about leaving it.
Mattress Fit After You Lower It
A lower base doesn't make a loose or overly thick mattress safer. It may look more securely tucked into the frame, but appearances don't tell you whether the edges fit or the underside lies flat.
Can you keep the same mattress? Usually, the relevant question isn't whether it's "old" or "new." It's whether that mattress is specified for the product, remains firm, and fits correctly at the new level.
Federal rules at 16 CFR 1241 require a full-size crib mattress to measure at least 27 1/4 inches wide and 51 5/8 inches long. The AAP adds a simple home check: if more than two fingers fit between the mattress and the crib sides or ends, the crib and mattress combination should not be used.
Compatibility still comes first. A mattress that bows, folds, or needs force to fit isn't the right solution.
This illustration captures the problem a height adjustment can't solve.
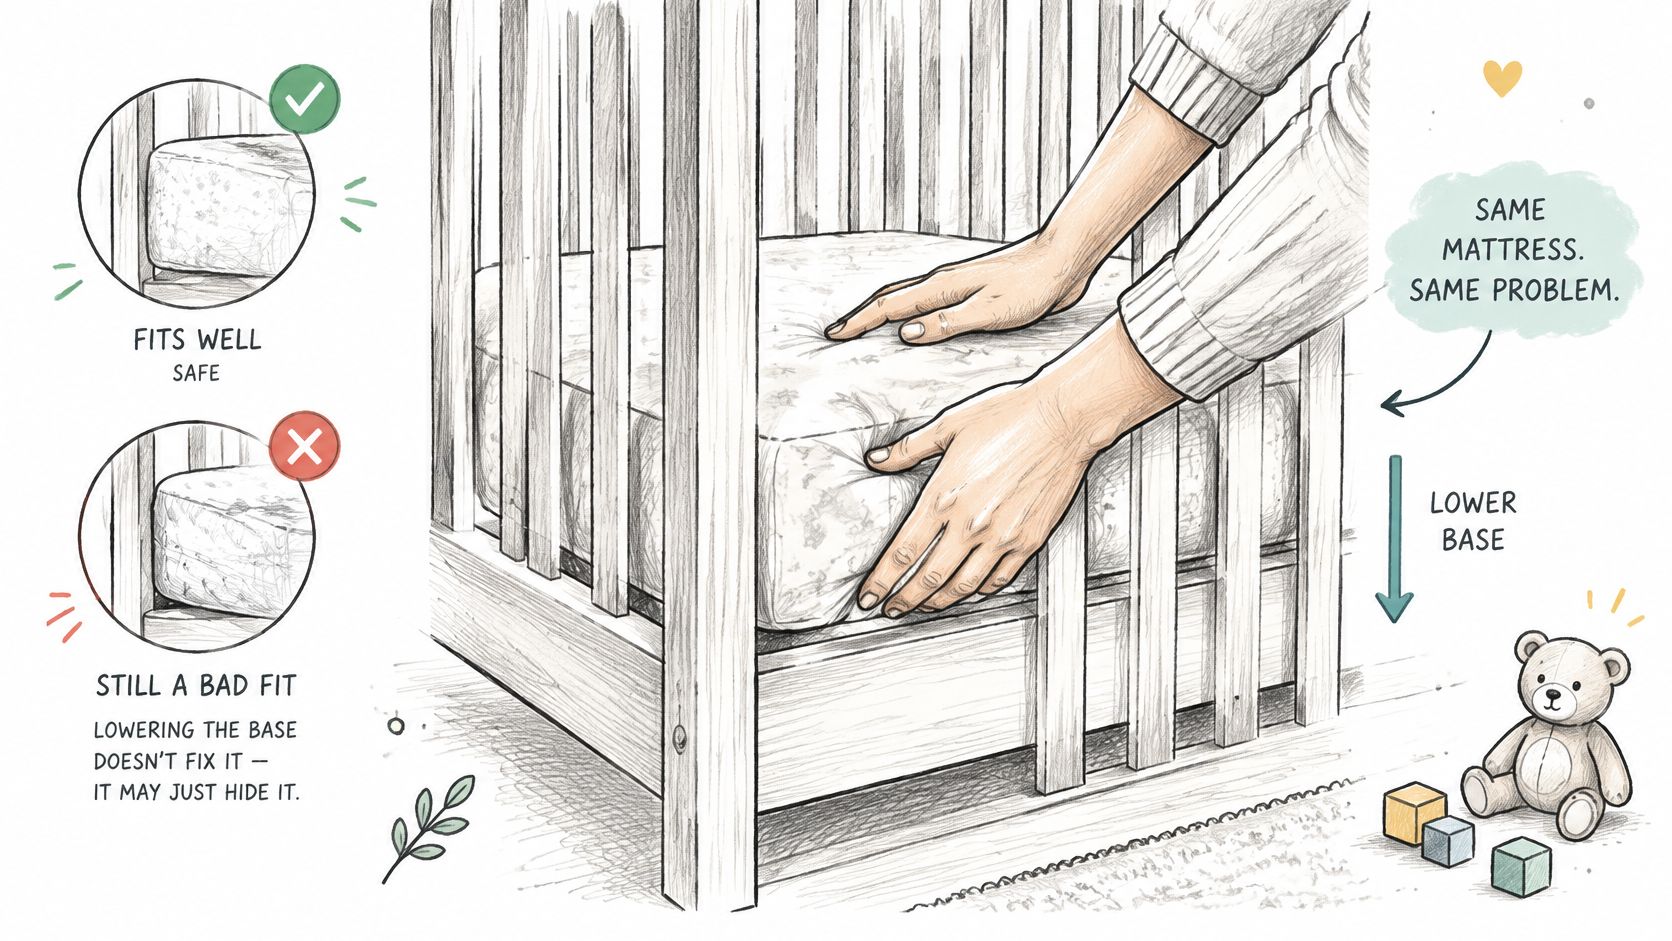
Check the mattress before touching the hardware
With your baby elsewhere, take off the sheet and inspect the mattress while it's still in the crib.
- Center it: Look along every edge for visible gaps. If more than two fingers fit between the mattress and the crib sides or ends, the AAP says not to use that combination.
- Press the edges: Watch whether the mattress shifts away from the crib wall or exposes a pocket.
- Look underneath: Check for bowed corners, folded material, or anything preventing full contact with the support.
- Remove additions: There shouldn't be a topper, second mattress, thick pad, positioner, or homemade spacer changing the fit.
- Match the paperwork: Check both the crib and mattress instructions, especially for a replacement or gifted mattress.
Hiccapop's guide to how a crib mattress should fit can help you distinguish a snug fit from a mattress that's merely wedged in place, and the guide to crib mattress foam explains what firmness looks like in a foam mattress.
Cribs and play yards aren't interchangeable
A full-size crib, mini crib, and play yard have different designs and mattress requirements. "Travel mattress" describes a shopping category, not universal compatibility.
That distinction matters when a grandparent buys a spare mattress or a traveling family borrows a sleep space. If the mattress and crib paperwork have never been together, bring them together before nap time.
Don't add padding to "improve" firmness or comfort. If the original mattress is compatible, firm, undamaged, and snug, reinstall it; if it isn't, changing the support height won't rescue it. Repeat the fit inspection after reassembly, before your baby returns.
How to Lower the Crib Mattress
The manual's sequence wins over any generic hole count. Some supports hang from brackets; others attach through posts or use a different locking mechanism. The lowest visible hole isn't automatically the approved lowest mattress setting.
Gather the Allen key or screwdriver specified for your crib, its original hardware, and a tape measure. Ask another adult to help if the support is awkward or heavy, and keep your baby out of the room while you work.
Use this preparation checklist before releasing any fasteners.
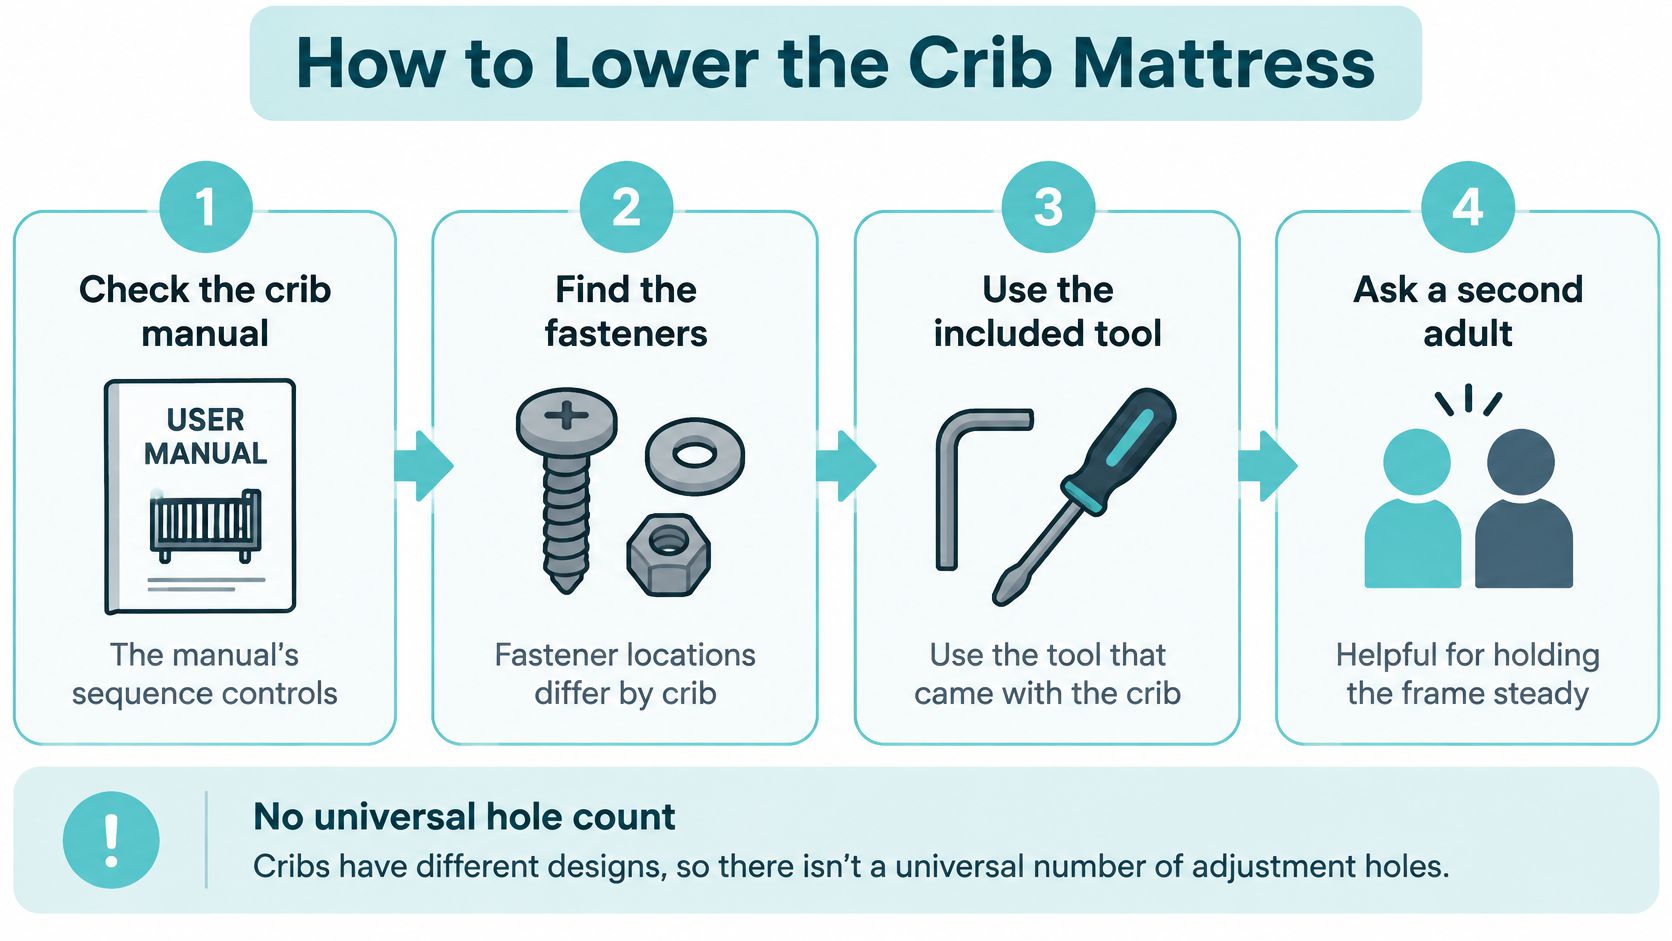
Follow the adjustment sequence
- Empty the crib completely. Remove your child, sheet, blanket, lovey, and mobile. This isn't a job to do around a sleeping baby, however impressively they sleep through vacuuming.
- Lift out the mattress. Place it flat on a clean floor, away from the work area. Don't prop it somewhere it could topple onto a child or block your footing.
- Locate every support attachment. Identify the hangers, clips, brackets, or bolts securing the platform. Trace the whole support rather than assuming the fasteners you can see are the only ones.
- Release the support as the manual directs. Have your helper hold it steady if necessary. Don't loosen unrelated frame connections just because they're easier to reach.
- Move every attachment to the approved lowest setting. All corners must sit at the same designated height. A hanger left at the previous level can leave the platform tilted even when the mattress partly hides the mistake.
- Reinstall the original hardware. Put screws, bolts, and washers back in their specified positions. A hardware-store screw that looks close enough may differ in length, thread, or strength; don't substitute it.
- Tighten as directed. Seat the connections securely without overtightening or damaging the wood. If a bolt spins, won't engage, or won't tighten properly, stop rather than applying more force.
- Test the bare support. Press firmly downward at each corner and check for rocking, tilt, or incomplete engagement. Look directly at each hanger or bracket instead of relying only on how sturdy the frame feels.
- Replace the mattress. Center it on the support and confirm that it lies flat. Inspect the perimeter again and complete the clearance and hardware checks before allowing your baby back.
- Add a fitted sheet only. Make sure it fits securely without pulling the mattress into a curve. Return your baby only after the entire setup passes inspection.
Adjusting by crib type
Support designs vary, so the same goal takes different steps. In every case, follow your crib's manual.
Bolt-on spring frames
The support bolts to the corner posts or end panels. Remove and reinstall the bolts one corner at a time at the designated lowest holes, using only the original hardware.
Hook or bracket supports
The platform hangs from hooks or brackets. Lift each corner off and reseat it at the lowest approved position, then confirm every hook is fully engaged.
Convertible cribs
Settings and parts can change between crib, toddler-bed, and daybed modes. Use the manual for your exact model to find the lowest crib-mode setting.
Catch reassembly problems before sleep
The AAP says all screws, bolts, nuts, plastic parts, and other hardware should be present and original equipment, and replacement parts must come from the manufacturer. The potentially serious mistake isn't just choosing the wrong level; it's leaving the support incompletely attached.
A mattress can conceal a poorly seated bracket. Test the support while you can still see every connection.
If a component is bent, cracked, missing, or won't lock securely, stop using the crib. Get the correct manufacturer-approved replacement rather than inventing a workaround, and recheck connections periodically and after moving the crib.
Rail Clearance and Hardware Checks
Start with the tape measure, not the mattress-setting label. Support-to-rail height and mattress-surface-to-rail height are different measurements. Adding mattress thickness changes the latter without moving the support at all.
For the structural measurement, locate the top of the mattress support at its lowest setting and measure vertically to the specified rail point. For the usable barrier above the sleep surface, start at the mattress's top surface instead.
This checklist shows where those measurements begin and end.
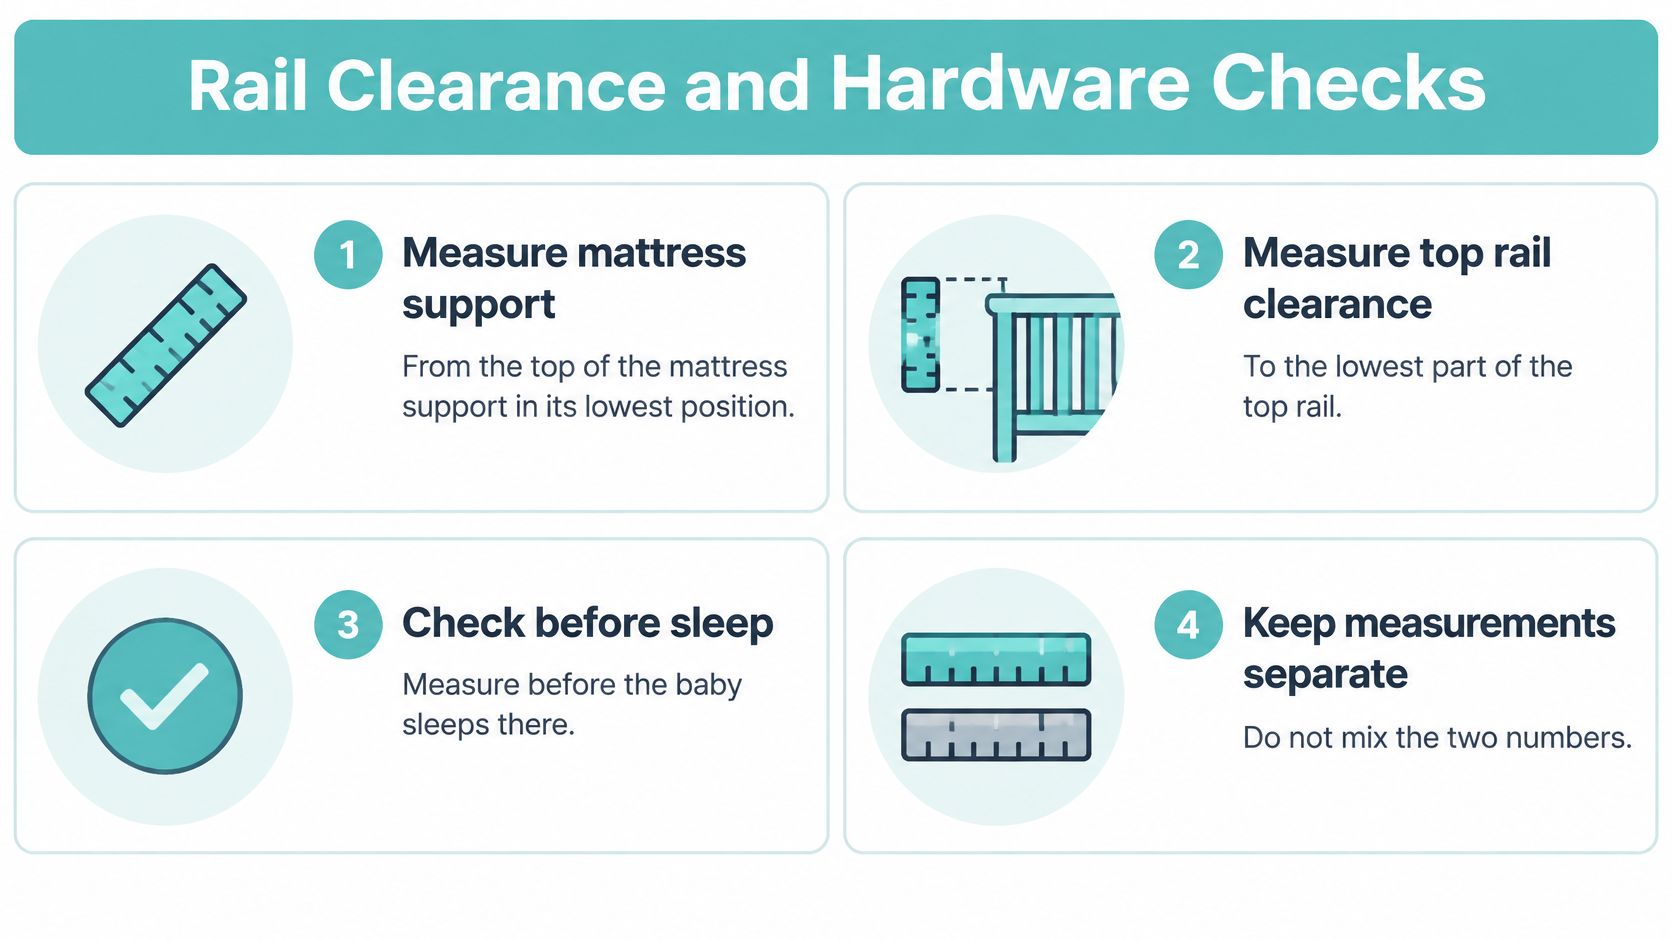
Clearances to confirm after lowering
The following limits come from the AAP Choosing a Crib guidance, 16 CFR 1219, 16 CFR 1241, CPSC non-full-size crib guidance, and CPSC 1976 non-full-size crib requirements. Keep each limit attached to its crib type and measurement method rather than treating the numbers as interchangeable. Full-size cribs must comply with 16 CFR 1219, and the AAP says raised crib sides should be at least 26 inches above the mattress support in its lowest position.
Top of mattress support at lowest position to lowest part of top rail
Limit: At least 26 inches. Applies to full-size cribs.
Top of the noncompressed mattress to the top of the crib side or end panel at its highest position, with the support at its lowest position
Limit: At least 20 inches. Applies to non-full-size cribs.
Mattress support at lowest position to side rail at highest position
Limit: At least 22 inches. Applies to non-full-size cribs (1976 CPSC requirement).
Full-size crib mattress size
Limit: At least 27 1/4 inches wide and 51 5/8 inches long. Applies to full-size crib mattresses.
Gap when centered, or when pushed to the side
Limit: Maximum 1/2 inch centered, 1 inch at the perimeter. Applies to non-full-size cribs.
Space between slats
Limit: No more than 2 3/8 inches. Applies to crib sides.
The AAP says slats should be no more than 2 3/8 inches (6 cm) apart. Measurements are a useful check, but they don't turn an altered, damaged, or incompatible crib into an approved sleep space.
Full-size crib check: At least 26 inches from the lowered support to the lowest top-rail point, a mattress at least 27 1/4 by 51 5/8 inches, and no more than a two-finger gap at the sides or ends. Measure the support, not the top of the mattress, for the structural rail-height check.
Check fit and fasteners together
Walk your fingers around the mattress perimeter to find places worth measuring. The AAP's rule is simple: if more than two fingers fit between the mattress and the crib, don't use that combination. Use the product instructions for the final decision.
Next, grasp the support and inspect each connection for movement. Don't accept a level-looking mattress as proof that everything beneath it is secure.
Use Hiccapop's crib safety checklist to review the surrounding sleep space as well. Keep cords, reachable objects, and climbable furniture out of the arrangement.
If your measurement doesn't match the manual, pause use and identify why. Check the approved support position, mattress compatibility, and assembly before assuming the crib needs "one more hole."
When the Lowest Setting Still Is Not Enough
The mattress is fully down, and your child is lifting a leg toward the rail. Or they've discovered that a stuffed animal makes a surprisingly useful step. This is the moment to assess the child and setup, not search for a secret basement setting.
Pulling to stand isn't the same as climbing out. A child may stand in a correctly assembled crib that still meets its use limits. Climbing ability, an attempted escape, or a reached product limit calls for a different response.
The CPSC 1976 non-full-size crib requirements barred any horizontal bar, ledge, projection, or other surface inside the crib that a child could use as a toehold for climbing. Lowering reduces available reach; it doesn't make climbing impossible.
Separate an assembly problem from an outgrown crib
A rocking platform needs a hardware inspection. A child who can climb out of a correctly assembled crib needs a different sleep arrangement. Those aren't interchangeable problems.
Problems after the mattress is already lowest
Support rocks or one side sits high
Likely cause: Hanger or bolt not fully seated. Do this: Empty the crib and reseat every corner with original hardware.
New gap along the mattress edge
Likely cause: Undersized, folded, or over-thick mattress. Do this: Switch to the mattress specified for that crib or play yard.
Child uses a toy or nearby furniture as a step
Likely cause: Climbable object inside or beside the crib. Do this: Remove it the same day and keep the crib away from dressers.
Child climbs out with a level, tight, lowest mattress
Likely cause: Child has outgrown the crib. Do this: Stop using the crib and move to a toddler bed per the manual.
These are inspection starting points, not remote diagnoses. A rocking corner could also involve damaged hardware, and a new gap could reflect a shifted or improperly supported mattress. Keep the crib empty until you've identified and corrected the cause.
Don't modify your way around climbing
Don't drill additional support holes, remove structural parts, stack books under a leg, attach a homemade rail, or add a restraint. Those changes don't create another manufacturer-approved setting.
Remove footholds promptly, including objects beside the crib that a child can grab or step onto. If your child is attempting to get over the rail, arrange the transition rather than waiting for a successful fall to confirm the concern.
Supervision is helpful during the changeover, but it isn't a substitute for a sleep space your child hasn't outgrown.
Move to a Toddler Bed at the Right Time
A correctly assembled low crib remains appropriate only while your child stays within its developmental and size limits. You don't need to rush a child who isn't climbing and still fits, but you shouldn't stretch crib use to reach a preferred birthday.
Health Canada's crib guidance says to move a child from a crib to a junior bed when they can climb out on their own or are taller than 90 centimeters, whichever comes first. The AAP nursery guidance also sets transition points at 35 inches (89 centimeters) or when the rail is less than three-quarters of the child's height, approximately nipple level. Follow the earliest applicable limit, including any stricter requirement in your manual.
Make the decision for this week
A child who is climbing out should move to a low toddler bed that fits the child's age and size limits in its manual. For a mattress-based toddler bed, preserve the same firm, flat, compatible, tight-fitting setup rather than adding layers to soften it.
- Staying in the crib: Verify the lowest support setting, secure hardware, suitable mattress, and continued compliance with the manual.
- Leaving the crib: Prepare the room for a child who can get out of bed independently, and plan the crib-to-bed transition before the next unsafe sleep.
The AAP's Choosing a Crib guidance, Health Canada's crib guidance, and 16 CFR 1219 are useful references to keep alongside your manual.
Common Mistakes When Lowering a Crib Mattress
- Waiting for standing: The AAP advises lowering before sitting, and Health Canada advises the lowest level once a baby sits up or pushes up on hands and knees.
- Using the lowest visible hole: Only the manual's designated lowest setting counts.
- Substituting hardware: The AAP says replacement parts must come from the manufacturer, not a hardware store.
- Leaving one corner high: Every attachment must move to the same setting.
- Adding padding or bumpers: The AAP says bumper pads should not be used, and Health Canada says bare is best.
- Keeping an old drop-side crib: The AAP advises a crib made after June 2011, when the standards banning the manufacture or sale of drop-side rail cribs became effective.
- Placing the crib near a window: The AAP advises against placing a crib near a window, to prevent serious falls and to keep children from getting caught in cords from window blinds or draperies.
For newborn settings before any lowering, see how high a crib mattress should be for a newborn.
FAQ
When should a crib mattress be lowered?
The AAP advises lowering the mattress before a baby can sit and having it at its lowest position before the child learns to stand. Health Canada advises moving the mattress support to its lowest level once a baby can sit upright or push up on hands and knees.
Can I lower a crib mattress with a convertible crib?
Follow your crib's manual. Convertible cribs differ in support positions and hardware, so use only the manufacturer's steps and parts.
How do I know the mattress fits?
A full-size crib mattress must measure at least 27 1/4 inches by 51 5/8 inches under 16 CFR 1241. If more than two fingers fit between the mattress and the crib sides or ends, the AAP says not to use that combination.
When should a child stop using the crib?
The AAP advises moving a child to another bed at 35 inches (89 cm) tall, or when the side rail is less than three-quarters of the child's height. Health Canada says to stop at over 90 cm, or once the child can climb out, whichever comes first.
Compare your manual with the milestone you noticed this week. Then tell another caregiver which setting the mattress is on tonight, or that the crib is no longer being used.
Hiccapop's Dual-Sided Foam Crib Mattress measures 52 x 27.5 x 6 inches and is made for full-size cribs. Use the firm infant side for babies; the plush memory foam toddler side isn't for infants. Check your crib's manual for its mattress dimensions before choosing.
Sources
-
- https://www.canada.ca/en/health-canada/services/safe-sleep/cribs-cradles-bassinets.html
- https://www.healthychildren.org/English/safety-prevention/at-home/Pages/Make-Babys-Room-Safe.aspx
- https://www.ecfr.gov/current/title-16/chapter-II/subchapter-B/part-1241
- https://www.healthychildren.org/English/ages-stages/prenatal/decisions-to-make/Pages/Choosing-a-Crib.aspx
- https://www.ecfr.gov/current/title-16/chapter-II/subchapter-B/part-1219
- https://www.cpsc.gov/FAQ/Non-Full-Size-Baby-Cribs
- https://www.cpsc.gov/Newsroom/News-Releases/1976/CPSC-Announces-New-Safety-Requirements-For-Non-Full-Size-Baby-Cribs