


Diaper Organizer for Changing Table: How to Choose
A diaper organizer for a changing table is a reach decision before it is a storage decision. The CPSC estimated 39,010 ER-treated injuries tied to baby changing products in children under 3 from 2005 through 2016. In CPSC's earlier 2005–2014 analysis in the 2016 proposed rule, 94% of estimated injuries involved falls.
HealthyChildren.org recommends a sturdy, stable changing table with a 2-inch (5 cm) guardrail around all four sides, and says never to leave a child unattended on the surface, even when a restraint is used. Those figures and that guidance set the bar for any organizer you mount or hang: it should keep the diapering sequence contained at the table so a caregiver is not stepping away to hunt for supplies. Capacity matters, but only after the setup lets one hand stay on the baby.
Disclosure: Hiccapop makes the wipe warmer mentioned in this post.

Why Reach Decides Your Layout
Treat the organizer as a workflow tool that supports one-handed changes. If a caregiver has to turn their shoulders, step sideways, or hunt through a pile, a hand leaves the baby. That is how many falls start, so layout comes before capacity, color, or how many pockets look nice in a photo.
A CPSC proposed-rule record covering 2005 through 2015 identified 182 changing-table incidents, including 5 fatalities and 30 injuries or adverse health problems. 64% of nonfatal reported incidents involved an infant falling from or through a changing table. Diapers, wipes, and barrier cream belong in the primary zone on the dominant-hand side, close enough that one hand stays on the child.
NIOSH workplace ergonomics guidance keeps frequent reaches under 16 inches, a useful target for the caregiver's reach. Give diapers, wipes, barrier cream, and a spare fastening garment their own open-front compartments. Stock one diapering cycle plus contingency supplies: several diapers, a wipe pack, cream, and one change of clothing. Don't stack anything above the rim. A stack forces a visual search and a second hand. HealthyChildren Changing Table Safety also says to keep diapering supplies within the caregiver's reach but out of the child's reach.
Where each item sits
Primary reach
Dominant-hand side, within about 16 inches: diapers, wipes, barrier cream.
Secondary reach
Further along the table, visible at a glance: spare clothing, backup diapers.
Child-out-of-reach
Never within the baby's grabbing range: small loose items, open containers, powder.
Closed waste
A plastic-lined, lidded trash can for used wipes and the dirty diaper, plus a plastic bag for soiled clothing, not an organizer pocket.
The primary zone is the only place to reach during the messy middle of a change. Secondary reach is for the spare outfit that might be needed, not the wipe that is always needed. Anything small and loose stays out of grabbing range.
- Same pocket every time: A hand should find the diaper without a glance. Moving the wipe pack "just for today" is how a caregiver ends up looking away.
- Labels or see-through bins: A partner, grandparent, or babysitter shouldn't have to learn the system mid-change.
- Nothing stacked: If retrieval needs two hands, the layout is already wrong.
Practical rule: If the pocket can't be named without looking, that item isn't ready for a one-handed change.
The organizer also has to leave the pad's usable footprint alone. It shouldn't crowd the barriers or force a lean across the baby. Wipe-clean, nonabsorbent surfaces beat fabric that soaks up leaks, and a removable liner is easier to wash than the whole caddy. For the rest of the room, a simple nursery organization plan keeps backup packs off the table so the changing surface stays a work zone, not a warehouse.
An organizer can't replace supervision. A strap doesn't erase fall risk, and a child is never left alone on the surface, even for the few seconds it takes to grab a missed wipe from the hall.
Measure Your Changing Table Before You Buy
Buy after measuring, not before. A changing table is a freestanding structure, and the CPSC baby-changing-products FAQ defines it as generally designed to support and retain a child weighing up to 30 pounds (13.6 kilograms). The organizer has to store supplies without interfering with stability, barriers, pad retention, or the restraint. The same FAQ says the regulation seeks to minimize injuries and fatalities from falls, failure of structural or mechanical components, instability, entrapment in openings, and suffocation. Covered children's products also need third-party testing by a CPSC-accepted laboratory. A tape measure is the matching step at home.
Six checks before ordering
Surface width and depth
Flat top, edge to edge: confirms footprint and pad clearance.
Height from floor to pad
Floor to top of pad: sets the reach height for the caregiver.
Rail or edge thickness
Point where a hook would sit: decides whether a hanging unit grips.
Strap or slot opening
Width of each opening: determines whether strap-hung units fit.
Solid surface behind table
Flat, solid wall or headboard: needed for adhesive strips.
Child weight limit
Manufacturer label or CPSC definition: designed to retain children up to 30 pounds (13.6 kilograms).
Work through them with a tape, not a guess.
- Width and depth, edge to edge on the flat top. Pad clearance is needed on every side. An organizer that eats the rail also eats the barrier.
- Floor to the top of the pad. That height is the standing reach. A pocket that looks fine in a listing can sit above a short caregiver's comfortable hand line.
- Rail or edge thickness where a hook would sit. A thick rounded rail and a thin square rail don't hold the same hook. If the hook can't close, the caddy will slide.
- Width of each strap or slot opening. A strap-hung unit only works if the strap passes through. Forcing it around a leg is how hardware loosens.
- The wall or headboard behind the table. Adhesive strips need a flat, solid surface. Textured paint and thin paneling are a no.
- The weight limit on the product label, read against that 30-pound (13.6-kilogram) definition. The organizer's load is extra mass on a structure already rated for the child, not a reason to ignore the label.
Write each number on a sticky note and compare it with the organizer's listed dimensions. Reject any product that needs a measurement that can't be taken. If the table flexes or wobbles, fix or replace the table before hanging a single diaper on it. Skip rail-hung organizers unless the changing table's manual expressly allows hanging from that guardrail or edge.
Organizer Types, Materials, and Mounting Compared
Five setups cover almost every nursery. The right one is the one that stays put when a diaper is pulled with one hand.
Freestanding tray or tabletop bin
Sits on the flat surface with no fixing. Best for renters and travel setups. Main risk: can slide or block the pad edge.
Hanging fabric caddy
Hooks over a sturdy rail or table edge only when the table's manual allows it. Best for small tables and single caregivers. Main risk: tips or slides when loaded off-center.
Under-table basket or shelf
Fixed to the frame or leg area. Best for large supply volumes. Main risk: can block leg space or trap small items.
Wall-mounted pocket panel
Screws or adhesive strips to a solid wall. Best for nurseries with a fixed table. Main risk: adhesive may fail on painted or textured walls. See Hiccapop's wall-mounted organizers guide for placement ideas that keep the top clear.
Built-in drawer organizer
Fitted into a dresser or drawer unit. Best for dresser-top changing stations. Main risk: pulled-out drawers can tip the unit when overloaded.
CPSC guidance on baby changing products treats falls, structural or mechanical failure, instability, entrapment, and suffocation as the principal hazards, and the requirements cover stability, barriers, retention of pads or add-on units, shelf entrapment, and restraints. A diaper organizer is an accessory. It isn't a restraint, and it isn't supervision.
Materials that survive leaks
Coated plastic, vinyl, or sealed wood is the easiest daily surface. It doesn't drink moisture, and it can be wiped after a blowout without waiting on laundry. Washable fabric is lighter and quieter, but it needs a removable liner. Without that liner, cream and urine sit in the weave until wash day. Wire or mesh drains and dries fast, which is useful for a wipe pack that gets damp, but the grid can catch small caps and the cut ends need a check so they don't snag skin.
Skip open tops that invite "just one more" pack. Maximum storage is often the less hygienic choice, because the bottom can't be seen and emptying stops.
Stability while pulling
Heavy items go low and toward the center. An off-center load raises tipping torque, which is exactly how a hanging caddy or a dresser-top station gets into trouble. The attachment has to resist sliding, rotation, and detachment during one-handed retrieval. Test it: load the pockets, then tug the diaper pocket the way a 2 a.m. change would.
Keep the organizer clear of the child, the strap, the pad, and the barriers. Don't create loops, narrow openings, or gaps that could trap fingers or limbs. Soft contents stay where they can't cover an infant's face. The useful spec is supplies reachable without reaching across the infant, with a clear path to the restraint buckle.
Mounting options are narrower than the catalog suggests.
- Hooks over a sturdy rail work when the table's manual allows rail hanging, the rail thickness matches the hook, and the rail itself doesn't flex.
- Straps through a designated slot work when that slot was measured and the strap isn't sharing it with the restraint.
- Adhesive strips on a solid surface work only at the weight the strip is rated for, on a wall or headboard that is solid.
A restraint doesn't remove fall risk, and the child is never left unattended, even briefly.
For most nurseries, a freestanding tray or caddy with open front compartments is the easiest place to start. It balances reach and stability without asking for a drill. If the table is fixed against a solid wall and the top should stay clear, compare a wall-mounted organizer against the adhesive and screw limits above before committing.
Budget, Gifts, and Compatibility
Price the table first, then the add-on. An organizer should cost less than the table it has to fit, because it's an accessory on a structure that already has a job.
Match the organizer to the measurements written down.
- Rail-hung caddy: The hook has to close on the rail thickness, and the table's manual has to allow hanging. A "universal" hook that sits proud of the rail will walk sideways.
- Strap-hung unit: The slot has to be wide enough, and the strap can't block the restraint buckle.
- Wall panel: A solid wall is required. Painted texture and removable wallpaper are failure points.
- Dresser organizer: This belongs on a dresser-top station that is stable with a drawer open, not on a wobbly thrift-store chest.
For a shower gift, don't guess the table. Ask for those six measurements, or choose a freestanding tray that needs no fixing and sits on most flat tops without covering the pad edge. A baby shower gift guide is more useful when the card includes the wipe-clean material and the weight label, so the new parent can check both before the first change. Pair it with a small starter set sized to how that caregiver changes diapers: diapers, wipes, cream, and one spare outfit for the primary zone, not a bulk box that forces stacking.
On a used table, look for cracked surfaces, loose hardware, and missing guardrails. A bargain table with a broken rail isn't a safe base for any organizer.
Clean, Check, and Buy With Confidence
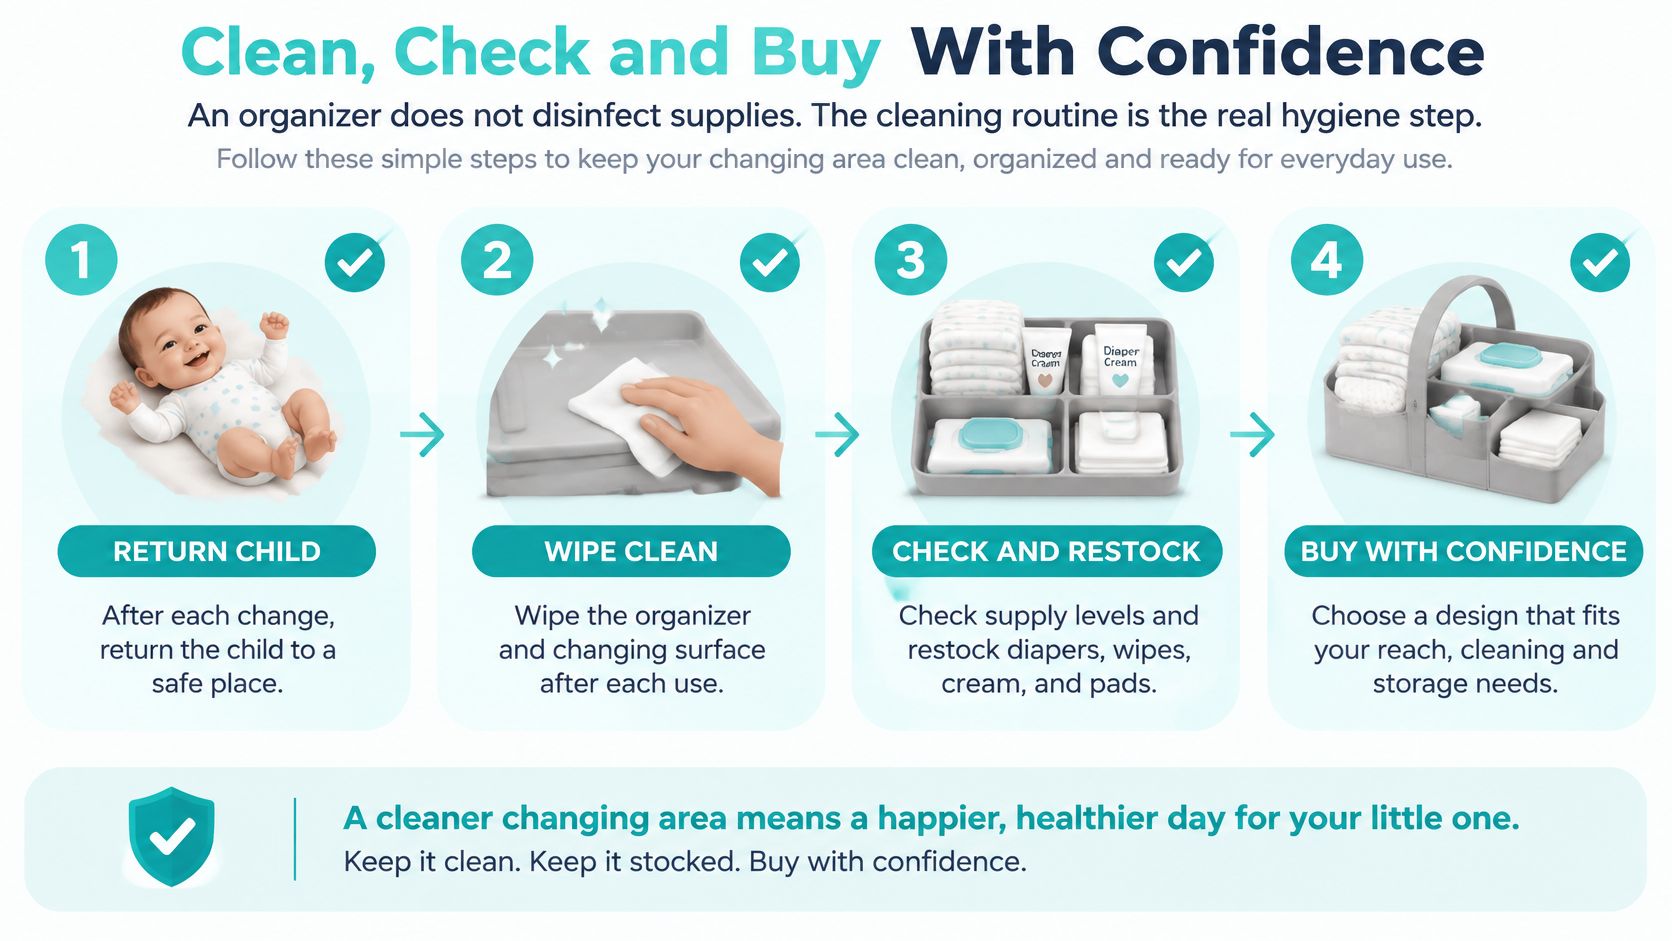
The organizer doesn't disinfect anything. The routine does. Clean supplies, soiled clothing, and waste don't belong in one open pocket, and a smaller caddy that gets emptied beats a large one that only gets admired.
The CDC home diaper-changing steps split the work by surface. Follow that split.
- Put the dirty diaper and used wipes in a plastic-lined, lidded trash can as they come off, and put soiled clothes in a plastic bag. After the change, wash the child's hands and move them to a supervised spot.
- Wipe visible soil off the changing surface with a damp paper towel or a baby wipe. A puddle can't be disinfected until it has been lifted.
- On a waterproof surface, scrub with disinfectant spray or a disinfecting wipe, follow the product's contact time, and let it air-dry. Shortchanging dry time is how residue stays wet under the next baby.
- If the pad has a fabric cover, remove the soiled cover and put on a clean one. A wipe won't replace a soaked cover.
- Wipe the organizer's open-front compartments and any wipe-clean face. Do this while the child is already somewhere supervised, not while they're still on the pad.
- Wash your own hands.
- Once a week, empty every compartment, wipe the interior, and check for cracks, loose straps, or bent hooks. Launder washable liners. Fabric that stays damp between changes is a smell problem before it's a safety problem.
- Replace any part that cracks, sags, or no longer grips. A hook that almost holds is a hook that will slide.
What to confirm before paying
Dimensions match
Sticky-note measurements agree with the product label.
Primary-zone items fit in one-hand reach
Diapers, wipes, and cream don't require a lean across the baby.
It stays put
Loaded, and pulled from one side, it doesn't slide, rotate, or lift off.
No traps
Loops, narrow gaps, and open holes can't catch fingers or limbs.
It wipes clean
The surface touched every change isn't a sponge.
Hiccapop's Wipe Warmer & Dispenser sits on the changing-table top, so measure for it alongside the organizer. It is a plug-in unit: keep the cord out of the baby's reach.
Common Mistakes With a Diaper Organizer
- Stacking above the rim: A pile forces a second hand and a look-away moment.
- Hanging on the guardrail: Rail-hung caddies belong only on tables whose manuals allow that mount; otherwise, leave the guardrail clear.
- Small items or powder in the baby's reach: HealthyChildren.org says to keep supplies out of the child's reach and never let a child play with a powder container.
- Used wipes in an open pocket: Put used wipes and the dirty diaper in a plastic-lined, lidded trash can, and put soiled clothes in a plastic bag, not an organizer pocket.
- Stepping away "for one second": HealthyChildren.org and the CDC both say to keep a hand on the child; a strap is not enough.
FAQ
Where should diapers and wipes go?
HealthyChildren Changing Table Safety says to keep diapering supplies within the caregiver's reach but out of the child's reach, so the caregiver doesn't have to leave the baby's side to get them.
Can a caddy hang on the rail?
Check the changing table's manual first. If it doesn't allow hanging from that rail or edge, choose a freestanding or wall-mounted organizer instead.
How should the organizer and pad be cleaned?
Follow the CDC home diaper-changing steps: put the dirty diaper and used wipes in a plastic-lined, lidded trash can as they come off, put soiled clothes in a plastic bag, wash the child's hands, move them to a supervised spot, then clean the surface and wash your own hands.
Is a safety strap enough?
No. HealthyChildren.org says to buckle the strap but not depend on it alone, and never leave a child unattended even for a moment. The CDC reminder is to keep a hand on the child at all times.
Measure the table, keep the primary zone inside one-hand reach, and clean the way the CDC describes. An organizer that fails any of those three jobs is the wrong accessory for that station.
Hiccapop's Wipe Warmer & Dispenser is built for the changing-table top: top-heated wipes, a silicone moisture seal, a 10-minute auto-off changing light, and a viewing lens to check the wipe level. Plug it in on the tabletop and keep the cord out of the baby's reach. Measure the warmer beside the organizer so both stay within adult reach.
Sources
-
- CPSC news release: federal safety standard for baby changing products (2018)
- Federal Register PDF: CPSC proposed rule for baby changing products (2016)
- CPSC FAQ: Baby Changing Products
- HealthyChildren.org: Changing Table Safety
- CDC: Healthy Habits - Diaper Changing Steps at Home
- NIOSH HETA 2008-0293-3132: workplace ergonomics (frequent reach under 16 inches)